
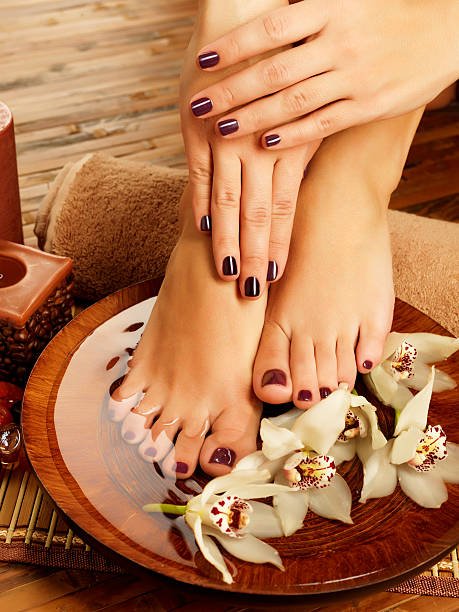
Step-by-Step Guide to a Perfect Gel Manicure at Home
29 May, 2024Achieving a salon-quality gel manicure at home is easier than you might think. With the right tools, products, and techniques, you can enjoy long-lasting, glossy nails without leaving your house. This comprehensive guide will walk you through each step to ensure a flawless gel manicure every time.
Preparing Your Nails
Gather Your Supplies
Before you begin, make sure you have all the necessary supplies:
- Nail file and buffer
- Cuticle pusher and nippers
- Nail cleanser or rubbing alcohol
- Gel base coat
- Gel color polish
- Gel top coat
- UV or LED nail lamp
- Lint-free wipes
- Nail oil
Clean and Shape Your Nails
Start by removing any old nail polish and washing your hands thoroughly. Use a nail file to shape your nails to your desired length and style, whether that’s square, round, or almond. Buff the surface of your nails lightly to remove any shine and create a rough texture for the gel polish to adhere to.
Push Back and Trim Cuticles
Using a cuticle pusher, gently push back your cuticles to create a clean edge around your nails. Trim any excess cuticle skin with cuticle nippers, being careful not to cut too much and cause bleeding. This step helps in achieving a neat, professional finish.
Cleanse Your Nails
Wipe your nails with a nail cleanser or rubbing alcohol using lint-free wipes to remove any dust, oils, or residues. Clean nails ensure better adhesion of the gel polish and prevent lifting.
Applying the Gel Polish
Apply the Base Coat
Start with a thin layer of gel base coat, covering the entire nail surface but avoiding the cuticles and skin. A thin application is crucial to prevent pooling and uneven curing. Cure the base coat under a UV or LED lamp according to the manufacturer’s instructions (usually 30-60 seconds for LED lamps and 2 minutes for UV lamps).
Apply the Gel Color
Apply the first thin layer of gel color polish. Again, keep the layers thin and even, and avoid touching the cuticles. Cure each layer under the nail lamp for the recommended time. Depending on the opacity of the polish and your desired look, you may need to apply 2-3 layers of color, curing each layer between applications.
Apply the Top Coat
Finish with a thin layer of gel top coat to seal the color and add a glossy finish. Ensure you cap the free edge of the nail to prevent chipping. Cure the top coat under the lamp as per the instructions.
Remove the Sticky Residue
After curing the top coat, you might notice a sticky layer on your nails. Use a lint-free wipe soaked in nail cleanser or rubbing alcohol to gently wipe away this sticky residue, leaving a smooth, glossy finish.
Finishing Touches
Hydrate Your Cuticles
Apply a nourishing cuticle oil around your nails to keep your cuticles hydrated and healthy. This step not only enhances the appearance of your manicure but also promotes nail health.
Maintain Your Manicure
To prolong the life of your gel manicure, avoid activities that can damage your nails, such as opening cans or peeling labels. Wear gloves when doing household chores and reapply cuticle oil regularly to keep your nails and cuticles moisturized.
Tips for a Long-Lasting Gel Manicure
Use Quality Products
Invest in high-quality gel polish and tools for the best results. Cheap products may not perform as well and can lead to issues like lifting, chipping, or allergic reactions.
Thin, Even Layers
Applying thin, even layers of gel polish is key to preventing bubbling and uneven curing. Thick layers can lead to wrinkling and peeling.
Proper Curing
Ensure that your nails are properly cured under the lamp. Follow the manufacturer’s instructions for curing times, and if in doubt, cure for a few extra seconds to ensure complete hardening of the gel.
Avoid Cuticle Contact
When applying gel polish, avoid getting it on your cuticles and skin. Gel polish on the skin can cause lifting and peeling. Use a small brush dipped in acetone to clean up any mistakes before curing.
Troubleshooting Common Issues
Peeling or Lifting
If your gel manicure starts peeling or lifting, it could be due to improper nail prep, thick layers, or getting gel polish on the cuticles. Ensure thorough nail cleansing and apply thin, even layers, avoiding the cuticles.
Bubbling
Bubbles in your gel polish can result from shaking the bottle, applying thick layers, or improper curing. Roll the polish bottle gently between your hands before use, apply thin layers, and ensure adequate curing.
Chipping
Chipping can occur if the free edge of the nail is not properly capped with polish or if the nails are exposed to harsh conditions. Make sure to seal the edges with each layer of polish and wear gloves when necessary.
Removing Your Gel Manicure
When it’s time to remove your gel manicure, avoid peeling or picking at the polish, as this can damage your natural nails. Instead, follow these steps:
- File the Top Layer: Gently file the top shiny layer of the gel polish to break the seal.
- Soak Cotton Balls: Soak cotton balls in acetone and place them on your nails.
- Wrap in Foil: Wrap each nail with aluminum foil to hold the cotton balls in place.
- Wait: Allow your nails to soak for 10-15 minutes.
- Remove Foil and Polish: Gently push off the softened gel polish with a cuticle pusher.
- Hydrate: After removal, wash your hands and apply cuticle oil to rehydrate your nails and cuticles.
Conclusion
With these steps and tips, you can achieve a perfect gel manicure at home that rivals professional salon results. Remember to invest in quality products, apply thin layers, and take your time to ensure each step is done correctly. Proper maintenance and care will help your manicure last longer and keep your nails healthy. Enjoy your beautiful, long-lasting gel nails!